Here is yet another brilliant tutorial that we have found online, showing us how to create fabric beads. We like the fact that we can make something so pretty with materials that most of us will have at home!
Here's how to do it:
1. Start with a strip of fabric and a cotton ball
2. Place the cotton ball on the fabric.
3. Wrap the cotton ball with the fabric.
7. Stitch smaller beads on to them (optional)
Here is another beauty of a tutorial we have come across - marbling paper, with items that most of you will have in your cupboards at home! Read on to discover how simple this technique is, and look at the eye-catching results you can achieve!
You will need:
- A baking tray (or any other shallow tray big enough to fit the paper you are using)
- Food colouring
- Cooking oil
- White paper (thick card stock produces as a nice result, thinner paper tends to get a bit greasy)
- Water
- An eye dropper (the eye dropper is optional, but does make things easier)
Photos and inspiration taken from http://unplugyourkids.com/2009/02/02/marbelized-paper/
1. Put just enough water in the tray to cover the bottom. If the water is too deep the results won't be as good.
2. Put about 1 tablespoon oil and 2 teaspoons food coloring into a glass.
Note: The two ingredients will not mix. At this point, the mixture will look something like this:
3. Beat with a fork until well blended (this will take a few minutes). When done, it will look more like this:
4. Using the dropper (or gently pouring if you don’t have a dropper), place drops of colours on top of the water. The drops will stay in a blob, or perhaps explode a bit. You can place one colour inside another. Experiment!
5. When you have dots of colour all over the surface of your water, use a toothpick, or a fork, or a feather (whatever you want to try) to make patterns in the colours. They’ll make blobs and swirls and pretty patterns.
6. When you are happy with the design, gently place your paper on top of the water. Leave it for a little bit, and then gently peel off.
7. Let the paper dry then use it for cards, wrapping paper, framed art, whatever you want!
How to Make Beads from recycled newspaper
How to Make Beads from recycled newspaper
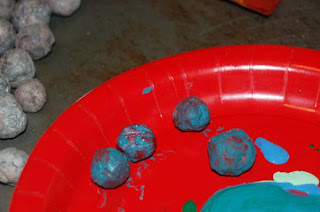
We spotted a picture of these lovely beads over the weekend, and couldn't believe it when we discovered that they are handmade from old newspapers! They look quite impressive - like beads you would buy from a specialist shop - and so we just had to share the tutorial on how to make them.
1. Gather a small pile of newspapers from the recycling basket.
2. Rip the paper into small pieces.
3. Put the pieces of newspaper in a large saucepan.
4. Pour enough boiling water over the paper to cover.
5. Allow to sit for an hour or so.
6. Stir the paper to help break it down a bit.
7. Drain as much water out of the paper as you can.
8. Add enough glue to the paper to help it hold together in a ball shape
(any glue that is clear when dry – such as PVA)
9. Roll the paper into round balls being sure to squeeze out as much moisture as you can while rolling (you can make any size you would like)
10. Let them dry for a few days – rolling them every several hours – until they are completely dry.
11. Sand each bead down with a bit of sandpaper to remove rough edges.
12. Drill a hole in each bead that is big enough for the material that you want to string them with.
13. Paint them with left over craft paint.
14. Give them a coat of varnish.
There are many different variations - different colours, different sizes, different shapes. Why not experiment and play around with a few ideas?
String the beads onto a necklace, and there you have it - a beautiful new piece of jewellery for next to nothing!
These could make a lovely present for a family or friend, or even if you feel like treating yourself!
Tutorial and photo taken from We are THAT Family and A Storybook Life...


